Fourth Year Design Project
One the major components of an engineering degree at the University of Waterloo is a “fourth year design project”, or FYDP. Projects are done in teams of four, and are largely under the control of the students themselves. Some students choose to work for researchers at the university or on projects for companies, while others develop their own ideas. The only real requirement for the project is that the topic is related to the students’ major — as a software engineer, this meant that I could do pretty much anything related to programming and software development.
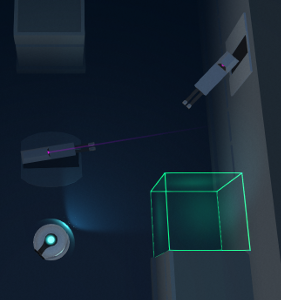
For our project, my team decided to experiment with using machine learning for adaptive game AI. We designed a simple top-down shooter where a human player competes against a team of computer-controlled drones. Both sides try to capture and control the objectives scattered around the level; the human player needs to hold three of the objectives to win, while the AI team must capture all four.
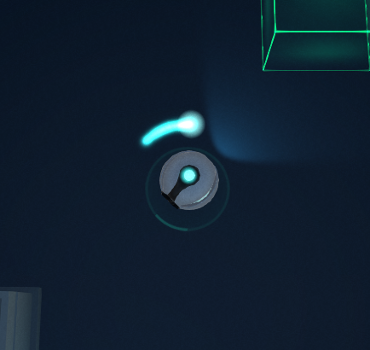
A player capturing an objective
The game is called unLit, and a demo can be downloaded here. UnLit runs on Windows, OS X and Linux, as well as certain browsers on Windows and OS X. The demo build is intended to help us evaluate how well the AI is performing, so there’s a survey at the end with questions about the behavior of the AI.
We’ve been working on the game for over a year, so there’s a lot of material to write about. My main contributions to the project were writing the code for level generation, abilities and weapons, as well as creating most of the 3D artwork. I was also responsible for designing and maintaining the overall structure of the codebase. This blog post is an introduction to the project — in the future I plan to write more detail posts on the work I did on unLit.
Level Generation
For me, the most interesting part of the project was developing a scalable system for generating random levels. Procedural level generation offers a pleasant mix of artistic and software challenges, with lots of interaction between the two. The code has to be robust enough to handle all of the possible artwork requirements, while the 3D models themselves need to be modular and consistent.
The map generator I wrote for unLit uses a total of six passes to create the level: topology, room, structural, two detail stages and objective/spawn zone filling step. The first stage generates a random network of rooms and halls, starting with a central room and expanding outwards. Initially, the rooms and halls are stored as rectangular bounding regions; the wall structure of the room and 3D models are assigned in future stages. Rooms and halls are allowed to overlap, creating a more organic level layout that feels less scripted.
An example of a map where two rooms overlap (note the unexplored region at the top)
After creating the topology, the map generator fills in the rooms using a collection of space filling algorithms. The junctions between hallways and rooms are carved out so they’re always accessible. The room and hall layouts are then turned into 3D objects using a structural generator. Each wall piece is chosen from a collection of models; the exact model is chosen based on the neighboring cells and a random factor. In the demo build the three wall piece styles are tall, short and holographic, each of which has roughly 15 different variations that correspond to different neighbor patterns. The artwork for the pieces are designed to mesh together in all valid cases.
Example of tall, short and holographic wall pieces
To add extra detail to the level a collection of “clutter” object are placed after the wall structure is created. Clutter includes both static detail like light sources and hanging wires, and dynamic objects such as turrets.
Clutter objects can be placed in a variety of ways, including between adjacent walls
The clutter generator processes wall and ground detail in two separate passes. Although some of the logic is shared, each pass has its own set of special features and parameters. Wall clutter objects, for example, can be configured to span cell gaps like the wires in the image above. On the other hand, ground clutter objects have customizable stacking settings that permit certain objects to stack on top of others. After all of the clutter is placed, the objectives and player/enemy spawn zones are added to the map.
The enemy spawn zone and various static clutter objects
One of the requirements for the map generator was that all major regions were pathable and unobstructed by clutter. To achieve this, the clutter generator is aware of the bounding size of the objects and walls in the scene. A variety of spacial constraints are evaluated before adding a detail object to the level to make sure that it has the necessary space. This was also used to make sure that no clutter clips through walls, which ruins immersion.
Gameplay
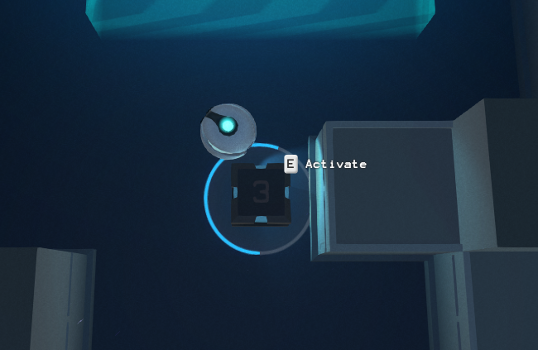
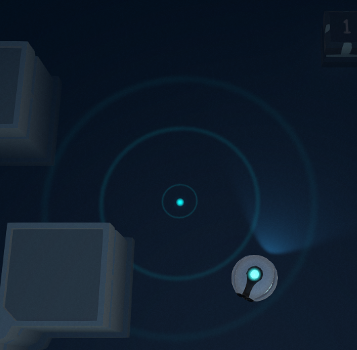
Each level has four randomly placed “cores” that can be captured by either team. To win, a team needs to capture and hold a sufficient number of cores for 10 seconds. The AI team consists for three drones, so the win condition for their team is to control all four cores. The player only needs to control three of the cores to win. A core takes around 1.5 seconds to capture when its in the netural state, and around 3 seconds to recapture if its controlled by the opposing team. To make the game fair, an AI drone takes slightly longer to capture a core than the player.
Basic Combat
Both the player and AI have similar representations in the game. The player is displayed as a white sphere with blue tinted lights and weapons, while the enemy drones are gray with red tints. Both have an energy shield around them that is able to absorb incoming damage. If the shield is depleted, the drone will lose health when attacked and will eventually be destroyed. Enemy units respawn 25 seconds after being destroyed, while the player respawns in 10 seconds. All units are equipt with a basic gun that does a moderate amount of damage.
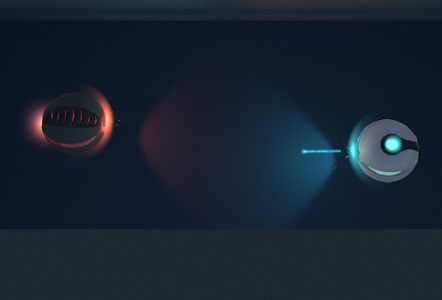
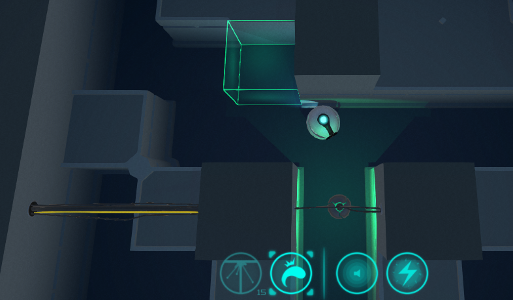
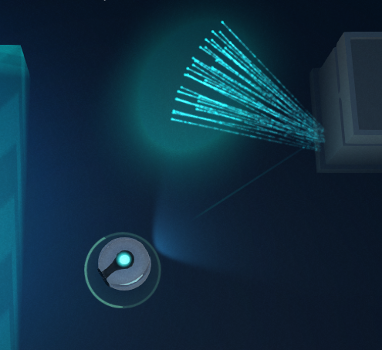
Both the player and the enemy have a basic ranged weapon. The ranged weapon projectiles can be bounced off the green "holo wall" surfaces
Secondary Weapons
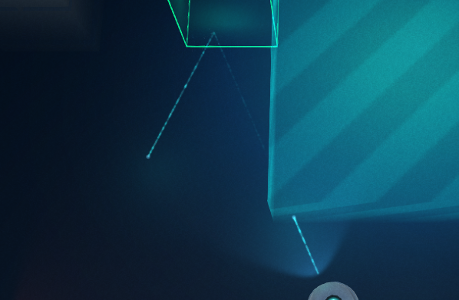
In addition to the basic ranged weapon, drones also have various secondary weapon slots. Using a secondary weapon builds up heat; when a threshold is reached the unit can no longer use secondaries until the heat dissipates. In the demo, the player has access to melee and a scatter shot. The melee weapon launches a projectile that spins up to 180 degrees around the player, stopping on the first target it hits. A successful melee attack does twice as much damage as the ranged weapon. Scatter shot fires a projectile that does very little damage initially, but splits into many high-damage projectiles when it collides with a wall. Enemy units are able to do melee attacks, but currently don’t use any other secondary weapons.
Melee and scatter shot secondary weapons. Secondary weapons generally do higher damage than regular ranged attack, however they also overheat if used too frequently.
Abilities
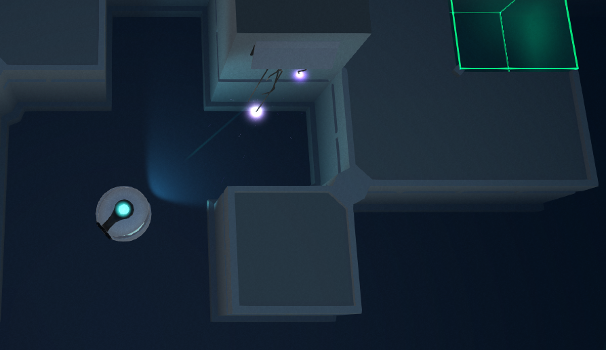
Drones are able to use special abilities that have non-damaging effects. For example, in the demo the player can use the decoy ability to distract the AI. The ability drops a pulsing beacon into the game world that persists for 5 seconds. Any AI that can see the beacon, but not the player, will hover around the beacon until it times out. The player also has an EMP blast that will temporarily disable nearby drones and turrets. Abilities have cooldown timers that limit how often they can be used. After emitting an EMP blast, for example, the player has to wait 15 seconds before they can reuse that ability. Currently, the AI units don’t know how to use abilities.
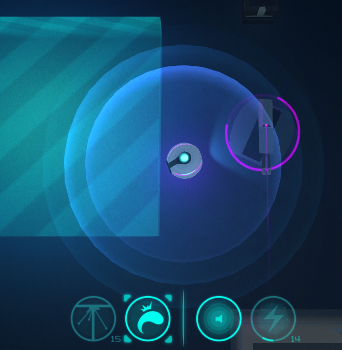
Active effects for the Decoy and EMP abilities